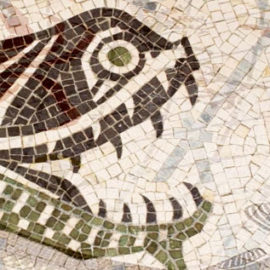
The beauty of creating a piece of Mosaic art out of broken glass and tiles is truly satisfying. It is the reason mosaics are taking off in popularity in recent times.
In this article, I’ve prepared a complete guide to Mosaic for beginners. By the end of the guide, you should have enough knowledge to start your project in no time.
1) Picking The Right Surface:
Before doing anything else, you need to first decide where the mosaic project is going to go. Accordingly, you can select the surface you want to use to create the mosaic.
- Indoor: The surfaces can range from plywood and old tables to vases and pots. Almost anything inside your home can be converted into mosaic art.
- Outdoor: The surfaces to use outdoors include cement, pots, and boards. Just make sure that you avoid surfaces that can absorb outdoor humidity or may warp over time.
2) Select Your Design:
Once you’ve selected a surface, next is picking out the perfect design.
If this is your first-time doing mosaic art, be sure to pick a simple design. Ensure that the tiles and glass pieces will fit the design you’ve chosen. Also, ensure that if you are using a translucent piece that you have clear glue.
I suggest you place all the pieces into the design you want in a separate area to ensure they fit. Also, consider the colors of the design and the image you want to portray. Using contrasting colors is a great way to make your focal image pop from the rest of the artwork.
3) Pick A Fitting Method:
When creating a mosaic project, picking the right method is important. For some projects, the indirect method is more effective while other projects will require the direct method.
Here’s a brief look at the two methods of creating Mosaic art:
- Direct Method: Directly gluing tiles to the surface is the most common (and popular) method of creating mosaics. Glue the pieces one at a time according to the design you’ve picked out. This will make the project look handmade while looking beautiful.
- Indirect Method: Use a mosaic mount to make a factory-smooth surface. Place the tiles face down on a mosaic mount sheet. Now simply flip the sheet onto the mosaic surface to create a flush surface.
4) Get To Gluing:
After your design has been selected and the placement method is decided, it’s time to get to gluing.
You can use special mosaic adhesives or regular fast-drying superglue if you are looking for a clear finish. Both adhesives come with a narrow-top squeezy bottle. This can make it easier to apply dots of glue to each tile.
You can choose to add a little glue to each tile or apply a line of glue to the surface. Either way works and it just depends on your preferences. And if the glue is being squeezed out from beneath your tiles, know that you are using too much.
Regardless of the glue you buy, ensure that it’s weatherproof, waterproof and it dries without stains. Weatherproof glue is especially important if you planning an outdoor project.
Along with gluing, you may also need some Mosaic Glass Cutters and Nippers to shape a few of the pieces. Repositioning a few tiles after gluing may require you to use a flat-head screwdriver to pry it out.
5) Grouting Time:
After you leave the glue to dry (24-hours is recommended), you can start grouting. You can choose the grout color based on your personal preference. However, black is often the commonly used one because it can make the colors pop.
There are different types of Grout available:
- Powder-Form: The most common type and also the cheapest. It comes in a dry powder form that requires it be mixed with water to form a paste. Aim for toothpaste consistency for the perfect grout.
- Pre-Mixed: You can get this if making the mix is too much of a hassle. It comes in a small tub and can be applied as-is. I have found that this type of grout, while convenient, can be a bit too sticky and difficult to spread.
- Sanded Grout: This grout looks a little coarse when it dries and isn’t recommended for mosaics. Try this if you have plenty of space in between your pieces and are looking for a rough look.
- Non-Sanded Grout: This grout is very smooth and can fill out small cracks and spaces perfectly. If your project has a few spaces that other types of grout are not ideal for, consider non-sanded grout.
While spreading the grout, use gloves as well as a grout spreader. Be sure to wipe off any excess grout that’s spilled onto the tiles after about 10 minutes. And after 24 hours of drying, your Mosaic Artwork Project is done.


